
Príklad
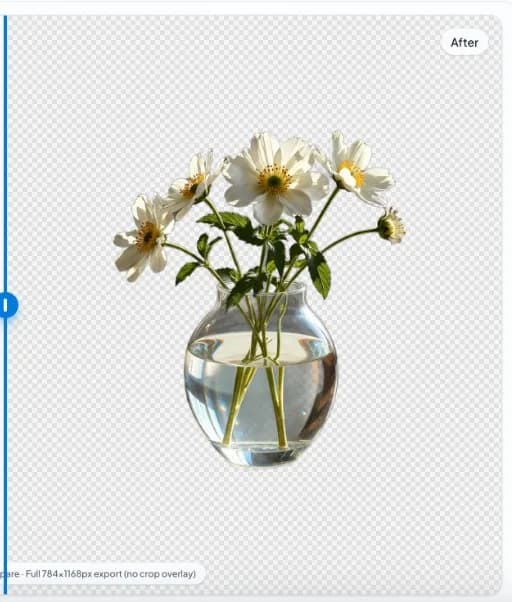
Príklad odstránenia pozadia pri fotografovaní produktov
Sklenená váza a kvety so silným svetlom - produktové zátišie od nobg.eu.
V skratke
- Výzva: sklo, voda a svetlá.
- Očakávanie: vierohodná alfa na reflexných povrchoch.
Pred

Po stránke
Product Photography section 1: practical detail
For Product Photography workflows on nobg.eu, treat background removal as a controlled production step rather than a one-click gamble. Example guidance 1 for Product Photography focuses on capture, mask QA, and export discipline shown in the before/after pair. Start from a source file that already separates the subject from the backdrop in luminance and color; local segmentation amplifies good capture decisions and cannot invent missing edge data. Open the asset in the browser editor, run on-device inference, then inspect the mask at 100–200% zoom along high-risk edges before you export. Use the on-page media as a visual reference, then repeat the checklist on your own files before publishing. Prefer transparent PNG or WebP masters when downstream systems support alpha, and flatten to a channel-required solid fill only after QA. Document filename patterns, padding conventions, and review checklists so teammates repeat the same quality bar without re-uploading assets to an external cutout API for every draft. When edges fail, fix lighting or reshoot rather than endlessly masking a compromised source—this is usually faster for Product Photography catalogs and keeps privacy intact because pixels for the core edit stay in the browser session.
Product Photography section 2: practical detail
For Product Photography workflows on nobg.eu, treat background removal as a controlled production step rather than a one-click gamble. Example guidance 2 for Product Photography focuses on capture, mask QA, and export discipline shown in the before/after pair. Start from a source file that already separates the subject from the backdrop in luminance and color; local segmentation amplifies good capture decisions and cannot invent missing edge data. Open the asset in the browser editor, run on-device inference, then inspect the mask at 100–200% zoom along high-risk edges before you export. Use the on-page media as a visual reference, then repeat the checklist on your own files before publishing. Prefer transparent PNG or WebP masters when downstream systems support alpha, and flatten to a channel-required solid fill only after QA. Document filename patterns, padding conventions, and review checklists so teammates repeat the same quality bar without re-uploading assets to an external cutout API for every draft. When edges fail, fix lighting or reshoot rather than endlessly masking a compromised source—this is usually faster for Product Photography catalogs and keeps privacy intact because pixels for the core edit stay in the browser session.
Product Photography section 3: practical detail
For Product Photography workflows on nobg.eu, treat background removal as a controlled production step rather than a one-click gamble. Example guidance 3 for Product Photography focuses on capture, mask QA, and export discipline shown in the before/after pair. Start from a source file that already separates the subject from the backdrop in luminance and color; local segmentation amplifies good capture decisions and cannot invent missing edge data. Open the asset in the browser editor, run on-device inference, then inspect the mask at 100–200% zoom along high-risk edges before you export. Use the on-page media as a visual reference, then repeat the checklist on your own files before publishing. Prefer transparent PNG or WebP masters when downstream systems support alpha, and flatten to a channel-required solid fill only after QA. Document filename patterns, padding conventions, and review checklists so teammates repeat the same quality bar without re-uploading assets to an external cutout API for every draft. When edges fail, fix lighting or reshoot rather than endlessly masking a compromised source—this is usually faster for Product Photography catalogs and keeps privacy intact because pixels for the core edit stay in the browser session.
Product Photography section 4: practical detail
For Product Photography workflows on nobg.eu, treat background removal as a controlled production step rather than a one-click gamble. Example guidance 4 for Product Photography focuses on capture, mask QA, and export discipline shown in the before/after pair. Start from a source file that already separates the subject from the backdrop in luminance and color; local segmentation amplifies good capture decisions and cannot invent missing edge data. Open the asset in the browser editor, run on-device inference, then inspect the mask at 100–200% zoom along high-risk edges before you export. Use the on-page media as a visual reference, then repeat the checklist on your own files before publishing. Prefer transparent PNG or WebP masters when downstream systems support alpha, and flatten to a channel-required solid fill only after QA. Document filename patterns, padding conventions, and review checklists so teammates repeat the same quality bar without re-uploading assets to an external cutout API for every draft. When edges fail, fix lighting or reshoot rather than endlessly masking a compromised source—this is usually faster for Product Photography catalogs and keeps privacy intact because pixels for the core edit stay in the browser session.
Product Photography section 5: practical detail
For Product Photography workflows on nobg.eu, treat background removal as a controlled production step rather than a one-click gamble. Example guidance 5 for Product Photography focuses on capture, mask QA, and export discipline shown in the before/after pair. Start from a source file that already separates the subject from the backdrop in luminance and color; local segmentation amplifies good capture decisions and cannot invent missing edge data. Open the asset in the browser editor, run on-device inference, then inspect the mask at 100–200% zoom along high-risk edges before you export. Use the on-page media as a visual reference, then repeat the checklist on your own files before publishing. Prefer transparent PNG or WebP masters when downstream systems support alpha, and flatten to a channel-required solid fill only after QA. Document filename patterns, padding conventions, and review checklists so teammates repeat the same quality bar without re-uploading assets to an external cutout API for every draft. When edges fail, fix lighting or reshoot rather than endlessly masking a compromised source—this is usually faster for Product Photography catalogs and keeps privacy intact because pixels for the core edit stay in the browser session.
FAQ
FAQ 1 for Product Photography?
For Product Photography, keep inference local, zoom-check edges (focus 1), and export transparent masters before flattening for any channel that forbids alpha.
FAQ 2 for Product Photography?
For Product Photography, keep inference local, zoom-check edges (focus 2), and export transparent masters before flattening for any channel that forbids alpha.
FAQ 3 for Product Photography?
For Product Photography, keep inference local, zoom-check edges (focus 3), and export transparent masters before flattening for any channel that forbids alpha.
FAQ 4 for Product Photography?
For Product Photography, keep inference local, zoom-check edges (focus 4), and export transparent masters before flattening for any channel that forbids alpha.
FAQ 5 for Product Photography?
For Product Photography, keep inference local, zoom-check edges (focus 5), and export transparent masters before flattening for any channel that forbids alpha.
Súvisiace: Sprievodcovia, Súvisiace riešenia, About.